
DreadShinobi
-
Posts
2867 -
Joined
-
Quote:It should also be noted that Judgment is affected by Musculature alpha increasing it's damage from 491 to 712 and is affected by resistance debuffs.Originally Posted by Techbot Alpha
 Judgment Info
 -
Villain side is less populated on most servers.
-
I've never actually heard of anyone that farms tips on a vig/rogue for the 50 reward merits. In the time it takes to do 10+1 tips you could get more reward merits doing tfs or have gotten an A-merit which is more valuable.
-
Quote:Energy Damage is common throughout the game, it's the 3rd most common damage type, right after smashing and lethal. But yeah, the fact that incarnate content is covered head to toe in it is quite nice also, pretty much the only thing that threatens my elec brute in incarnate trials is pulling all the IDF in TPN when not doing seers, but that's mostly because of the stacked debuffs.Originally Posted by JuliusSeizure
Yeah, Electric Armor does OK for itself... around level 36. Where Electric Armor really starts to shine is Incarnate content, when energy typed damage is extremely prevalent.
-
I highly doubt I would use my A-merits on ATOs. The only thing I use my A-merits on are glad armor procs. Nevertheless I still agree that you should be able to get ATOs with A-merits. More options is good.
Also it's not really a bonus for rogues/vigilantes that you can't get them with A-merits. It's just a disadvantage for heroes/villains. -
Quote:Maybe. Aim and BU are already really strong already especially on a Blaster which has very high damage mods, it worked for pbs because they have low damage mods.Originally Posted by Kyriani
Buildup/Aim Ideas: Give them the Inner Light treatment that Peacebringers got
No.Quote:OR for the 10 seconds they are active have Aim give a small unenhanceable defense buff and Buildup give a small unenhanceable resistance buff.
I don't think the crash of nukes should be completely removed because that would upset the balance between nukes with crashes and nukes without crashes, but the crashes should definitely be reduced in some form or another.Quote:Tier 9 Nukes: For blasters only, simply remove the crash from their Nukes
Blasters aren't Doms.Quote:and increase the mag of any mez effect associated with them to mag 4. Let those nukes grant survival through mez that's guaranteed to affect most (not all! and not elite!) bosses.
Fire definitely doesnt need mez effects, it's already the strongest primary blasters have by a long shot, if fire got a stun in blaze the damage would be gutted. Taser is fine. Giving Burn stun and sleep protection would be overpowered.Quote:Secondary Effects: Add more soft mez secondary effects to some blaster primary and/or secondary abilities. The Fire Blast set could get a stun added to Blaze (much like radiation's cosmic burst), Devices Taser could have its range significantly increased, Burn from Fire Manipulation could give more than immob protection but also stun and sleep protection as well... nothing says "wake the f--- up!" like standing in fire :P Little ideas like this which don't fundamentall change the basic functions of the powers but let blasters take a little bit from the survivability/mez plate since everyone else seems to be nipping cookies from the damage plate.
I'm a strong believe that blasters should still have low base survivability, the problem I see is that other ATs can do as much damage as blasters with significantly better base survivability. Basically Blasters trade their survivability for damage, but the damage they get in comparison to other ATs isn't where it should be. Giving them more mezzing capabilities won't fix blasters, they need more damage, if you want a high damage AT with good mezzing a dom is what you want. -
Quote:Really? Most people say the ato dmg procs are awful in aoes. I've noticed the same with the ato dmg proc i put in my corruptor's fireball which seems to proc less than than the positrons blast dmg proc i had in it previously.Originally Posted by Jibikao
I later unslot the proc and put it in an aoe. I think blaster proc works better in an aoe with 12s or longer recharge.
-
Quote:Because Gloom is required for the highest ST dps on an SS/Fire. If you're only using your ss/fire for farming then you can stay with mu mastery. But even for farming Dark Obliteration is just as good as Ball Lightning and the loss of Elec Fences isnt that big of a deal.Originally Posted by Jordanhead23
Why soul over Mu mastery ?
-
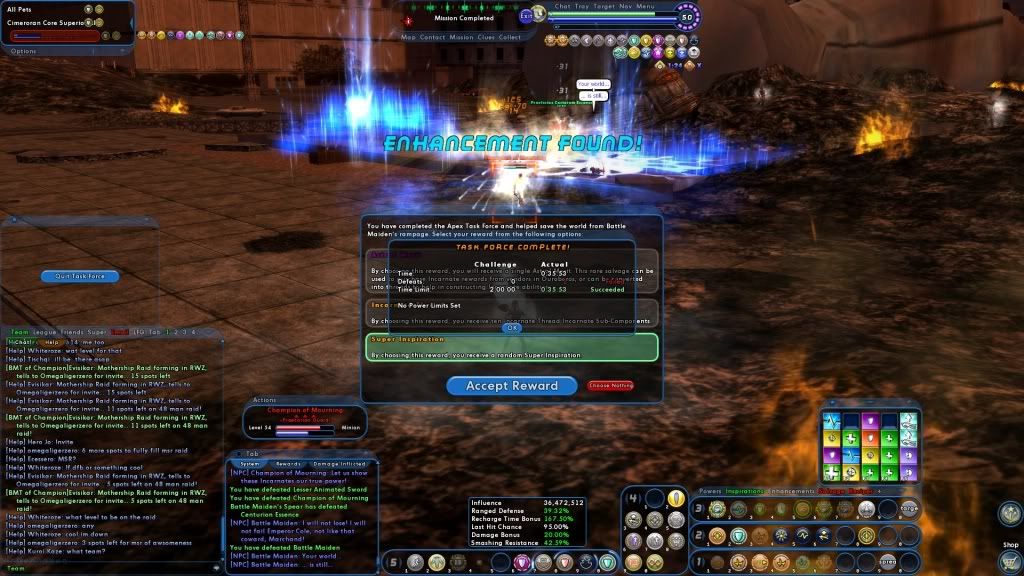
It's been done before, but yeah, solo apex.
-
Here's my build for comparison. It's not updated with ATOs but it will hopefully give you some good ideas. Also keep in mind it's built around Spritual Alpha for recharge and Ageless Destiny for Recovery. It can farm insanely fast on +4/x8 and does very well in all other content.
Villain Plan by Mids' Villain Designer 1.953
http://www.cohplanner.com/
Level 50 Magic Brute
Primary Power Set: Super Strength
Secondary Power Set: Fiery Aura
Power Pool: Speed
Power Pool: Leaping
Power Pool: Fighting
Power Pool: Leadership
Ancillary Pool: Soul Mastery
Villain Profile:
------------
Level 1: Punch KntkC'bat-Acc/Dmg(A), KntkC'bat-Dmg/EndRdx(5), KntkC'bat-Dmg/Rchg(7), KntkC'bat-Dmg/EndRdx/Rchg(7)
Level 1: Fire Shield RctvArm-ResDam/EndRdx(A), RctvArm-ResDam/Rchg(3), RctvArm-ResDam(3), RctvArm-ResDam/EndRdx/Rchg(43)
Level 2: Haymaker Hectmb-Dmg/Rchg(A), Hectmb-Acc/Dmg/Rchg(9), Hectmb-Acc/Rchg(9), Hectmb-Dmg/EndRdx(11), Hectmb-Dam%(34)
Level 4: Healing Flames Panac-Heal/EndRedux(A), Panac-EndRdx/Rchg(21), Panac-Heal/Rchg(21), Panac-Heal/EndRedux/Rchg(23), Panac-Heal(29)
Level 6: Blazing Aura Oblit-Dmg(A), Oblit-Acc/Dmg/Rchg(29), Oblit-%Dam(31), Oblit-Acc/Rchg(34), Oblit-Acc/Dmg/EndRdx/Rchg(36), Oblit-Dmg/Rchg(36)
Level 8: Knockout Blow KntkC'bat-Acc/Dmg(A), KntkC'bat-Dmg/Rchg(13), KntkC'bat-Dmg/EndRdx/Rchg(17), KntkC'bat-Dmg/EndRdx(19)
Level 10: Hasten RechRdx-I(A), RechRdx-I(11)
Level 12: Combat Jumping LkGmblr-Rchg+(A)
Level 14: Super Speed Zephyr-ResKB(A)
Level 16: Plasma Shield HO:Ribo(A), HO:Ribo(17), S'fstPrt-ResDam/Def+(37)
Level 18: Rage Rec'dRet-ToHit/Rchg(A), Rec'dRet-ToHit(19)
Level 20: Consume Efficacy-EndMod/Rchg(A), Efficacy-EndMod(50)
Level 22: Boxing KntkC'bat-Acc/Dmg(A), KntkC'bat-Dmg/EndRdx(23), KntkC'bat-Dmg/Rchg(25), KntkC'bat-Dmg/EndRdx/Rchg(25)
Level 24: Tough HO:Ribo(A), HO:Ribo(34)
Level 26: Weave LkGmblr-Rchg+(A), LkGmblr-Def(27), LkGmblr-Def/EndRdx(27)
Level 28: Burn Oblit-Dmg(A), Oblit-Acc/Rchg(31), Oblit-Acc/Dmg/EndRdx/Rchg(31), Oblit-Dmg/Rchg(33), Oblit-Acc/Dmg/Rchg(33), Oblit-%Dam(33)
Level 30: Taunt Zinger-Acc/Rchg(A), Zinger-Taunt/Rchg/Rng(37), Zinger-Taunt/Rchg(40), Zinger-Taunt(40), Zinger-Taunt/Rng(42), Zinger-Dam%(42)
Level 32: Foot Stomp Armgdn-Dmg/Rchg(A), Armgdn-Acc/Dmg/Rchg(37), Armgdn-Acc/Rchg(39), Armgdn-Dmg/EndRdx(39), Armgdn-Dam%(39), FrcFbk-Rechg%(40)
Level 35: Fiery Embrace RechRdx-I(A), RechRdx-I(36)
Level 38: Maneuvers LkGmblr-Rchg+(A), LkGmblr-Def/EndRdx(43), LkGmblr-Def(45)
Level 41: Gloom Apoc-Dmg/Rchg(A), Apoc-Dam%(42), Apoc-Acc/Rchg(43), Apoc-Acc/Dmg/Rchg(48), Apoc-Dmg/EndRdx(50)
Level 44: Dark Obliteration Posi-Acc/Dmg(A), Posi-Dmg/Rchg(45), Posi-Dmg/EndRdx(46), Posi-Acc/Dmg/EndRdx(48), Posi-Dam%(48)
Level 47: Tactics Rec'dRet-ToHit/Rchg(A), Rec'dRet-Pcptn(50)
Level 49: Temperature Protection GA-3defTpProc(A)
Level 50: Spiritual Core Paragon
Level 0: Born In Battle
Level 0: High Pain Threshold
Level 0: Invader
Level 0: Marshal
------------
Level 1: Brawl KntkC'bat-Acc/Dmg(A), KntkC'bat-Dmg/EndRdx(45), KntkC'bat-Dmg/Rchg(46), KntkC'bat-Dmg/EndRdx/Rchg(46)
Level 1: Fury
Level 1: Sprint Clrty-Stlth(A)
Level 2: Rest Empty(A)
Level 4: Ninja Run
Level 2: Swift Run-I(A)
Level 2: Health Numna-Regen/Rcvry+(A), Mrcl-Rcvry+(13)
Level 2: Hurdle Jump-I(A)
Level 2: Stamina P'Shift-EndMod(A), P'Shift-End%(5), P'Shift-EndMod/Rchg(15), P'Shift-EndMod/Acc(15)
------------
Set Bonus Totals:
12.5% DamageBuff(Smashing)
12.5% DamageBuff(Lethal)
12.5% DamageBuff(Fire)
12.5% DamageBuff(Cold)
12.5% DamageBuff(Energy)
12.5% DamageBuff(Negative)
12.5% DamageBuff(Toxic)
12.5% DamageBuff(Psionic)
32.88% Defense(Smashing)
32.88% Defense(Lethal)
6% Defense(Fire)
6% Defense(Cold)
7.25% Defense(Energy)
7.25% Defense(Negative)
6% Defense(Psionic)
25.06% Defense(Melee)
6.63% Defense(Ranged)
6% Defense(AoE)
81.25% Enhancement(RechargeTime)
57% Enhancement(Accuracy)
5% FlySpeed
236.1 HP (15.75%) HitPoints
5% JumpHeight
5% JumpSpeed
Knockback (Mag -4)
Knockup (Mag -4)
MezResist(Immobilize) 12.1%
MezResist(Stun) 4.4%
MezResist(Terrorized) 2.75%
20% Perception
15.5% (0.26 End/sec) Recovery
56% (3.5 HP/sec) Regeneration
6.62% Resistance(Fire)
6.62% Resistance(Cold)
5% RunSpeed
| Copy & Paste this data into Mids' Hero Designer to view the build |
|-------------------------------------------------------------------|
|MxDz;1521;694;1388;HEX;|
|78DA65944B6F125114C7EFED0C5628159016E88B571F50280 3A81BDF512B4653122|
|A891A3784B4572021800324BA74E14E379AE842FD0A6EB4D6 D747F12BF8D8FBC033|
|73FE2D244C20BF3BE731E7FCEF993BC5079BEEB7D71E5D147 2EA4AB3DAED562E9BF|
|D9E7214ABB5C68E26E89AA4FFBC6DAC14555329A3DCEF28B3 52EE99AA55EBD543EC|
|DA54F754ABAB8C4243990F2B97FA66D577BD555714D3330E1 6AE52BBDD34CA1DA57|
|6DDF6724B553B8D566DDABE29346AF51EDD790E5CBBCAECD6 1B9DE0D54E63C7E02A|
|E576BF592956BB3D2A12A2BE52F48F4B816BA0899265D085B ECD3C72132C33F7AC3|
|089D8302D12BA98888071662AC65C960815035D262684C8EB E268125C67BA52CC58|
|9AB94FD11A72B445CDB6CD2C81616620C25C8C323F50B4837 B72387EF37316FF31C|
|38263627FF87E7900FE65AE4A9E8FA56712DADDD0EC85E6E3 D88B38053AB98E74A6|
|05F70F06C837C53E31352BB906D9A6F9D962FA1BD7FB44771 E8E9BF05C20E89AF08|
|22B41722CE92241F04969D7F1BDA63C3FF5F08AF999AC7EE1 B27DFEA7FCCCFC13A6|
|A47AB3D0320B2D01F41E82A6103469141B849620EAC7409D7 C73E8710E5AE667402|
|FF30B7917B89663017B1EC61E87B1C751EC7114B38862166B 964CE42EDD67DF4A87|
|9968832DE6BA097641CA8D2037721AB967986B67C173E0793 CEB31F3AB259D73651|
|C735B067DA479159A57A13905AD1BD06E9DE624DECD6406FD E499A92C336B602639|
|A6A29C3472D2EFB8D6C61E33F39E99DD073F32FDD48B813E0 DCC3FFF866985E4F09|
|EE54EE01CE8E3E7770373CF60EE19CC3D358CA51F5D223766 C98F594E8E594E8D59|
|0A9645162CCB606BD4EBE49D28E9875F0321ED0CA7F7F0AC0 FBED32B2DA14B66781|
|F7E0E6D52DEE219B86FF0B7E5C7687C92E37F0D6D9A7CC655 F597CC63CFC117CC6D|
|3F816307DB2EAB02AF6F8FACEF8CACEF8EACFF0381B2E03E|
|-------------------------------------------------------------------| -
Quote:Duo it. That's how I originally got it when I was still newish to the game. I was pretty worried that I would either A) dc and run out of time or B) get stuck not being able to find a glowie. Asking a reliable friend to help out means you're not at risk of getting screwed over by either of those circumstances assuming it's not an overly long dc on the last mission of the arc or your friend also sucks at find glowies.Originally Posted by Roderick
Things where failing once means that you will never get that reward are not cool in my book. Yes, I'm talking about you, Efficiency Expert Pither. They annoy me so much that I've never even attempted Pither's badge, even though I've had several people tell me how easy it is, even though I'm fully IO'd out with T3/4 Incarnate abilites, even though my girlfriend got it by accident when she didn't even know the badge existed, just because I know that if I do try for it, there's a chance that I may have a hiccup in my Internet, or a power failure, or a lag spike, and fail a mission, losing the badge. In my mind, not having the badge, but having the chance to get it later is better than losing the one and only chance to get it ever.
-
The difference between 75% fury and 100% fury is a 50% dmg buff, which is nice, but you have to realize you're still working with off of the not so hot Brute damage modifiers. For comparison (albeit not a great one) t4 musculature core tends to be a 25-35% dmg buff in attacks with typical slotting. It's a pretty well known consensus that Musculature is never a good choice on a Brute, granted that is comparing the entire alpha slot to a single enhancement slot.
What really makes the Brute ATO amazing is when you split it 3/3 you get 6% hp and 10% S/L defense for 6 slots. In comparison 3 sets of kinetic combats gives you 4.5% hp and 11.25% S/L defense, except that it takes 12 slots. Basically by switching out 3 sets of kinetic combats for 1 set of Brute ATOs you're saving SIX slots. Six slots is alot. Six slots can mean another purple set, and considering the Brute ATO only takes 2 powers instead of the 3 powers that kinetic combats takes to get similar bonuses you will probably have room for that set and still have 2 more extra slots to work with after that. -
The mech from RV.
-
Quote:I don't have an issue with other people trading/selling names. However 300 mil (or whatever silly amount people ask for) is a bit on the greedy side (imo) and the names are typically not that great tbh (again, imo)Originally Posted by The_Masque
I guess I may be the only person who doesn't see an issue with selling/trading items for names.
I really don't understand why this is such a big deal and is always responded to with such venom.
We've all seen people offer 'services' for inf like base building, crafting, xp obtainment, builds and the like. I really don't see the difference between offering those things and offering a name.
I know that people have stated that names shouldn't be 'sat' on ... or was is squatted... I forget... but is there any difference between keeping a name and not 'using' it as me keeping a IO in a bin.
I imagine that people will say that it is the uniqueness of the name that is of issue here. That if the OP is squatting on these names then they aren't available to anyone else who would "actually" use them. If this is true, then isn't there a demand for these names? However, from most of the posts in this thread and others like it people mock the names for sale saying they are unoriginal and they wouldn't touch them with a ten foot pole. If so, than the names have no value and who cares if he is squatting on them.
Can someone please explain to me why it is so offensive to offer to sell/trade a name? -
Quote:Read all the harcore nerdrage about people failing trials and how much they hate them because they fail them a couple times.Originally Posted by dugfromthearth
not be defeated, but actually fail missions. And not forced failures like no matter what you do Statesman is killed. But as in Lady Jane gets defeated or more than 30 fir bolgs escape.
A lot of missions say there is time pressure but then there is none.
Whereas in safeguard if you do not stop the bombs in the sewers they blow up and if you are inside you are defeated.
Or you can just fail to stop the bank robbery.
I like the idea of having some higher pressure missions - with a higher xp reward for mission success, maybe.
I wonder if the repeatable missions in pvp zones, hollows, etc could be changed to a shorter time limit like 15 minutes. Make them rush missions. Of course that might just mean ninjaing missions
I can't possibly see putting more timers on normal missions throughout the game as going over well with the community. -
Good luck out there.
-
Don't skip Forge, Heat Ex, or Melt Armor. Seriously, they're core powers in thermal.
-
My view on it:
Scrappers should get Nin.
Stalkers should get Shield.
If Stalkers don't get Shield, Scrappers should still get Nin.
If Scrappers don't get Nin, Stalkers should still get Shield. -
Quote:Totally depends on your playstyle. At +0/x4 you won't need defense.Originally Posted by Humility
So I've been kind of itching to play a spines character and was thinking about probably a scrapper with an armor set that has a damage aura just to double up and see how that goes. I have little experience with the resist sets however, and they just don't seem to offer the kind of survivability you would get with a defense set.
I just wanted to see if they are viable on their own for mid level play at a reasonable solo pace. I guess I would consider that to be +0/x4 or greater. Will I have to start stacking IOs with defense bonuses to get any kind of reasonable play experience? -
I would drop placate for hasten, switch weapon mastery for blaze mastery, and potentially drop power surge for power sink for end management. I'm not sure what you're considering putting in AS, but I can almost guarantee a 6th slot in it would be beneficial.
-
Quote:That's what I'm doing with my TW/Elec and SS/Fire Brutes as soon as I have enough catalysts do so.Originally Posted by Draeth Darkstar
Best use of splitting ATO sets I've seen so far is using the Brute/Scrapper catalyzed ones in two different powers, 3/6 each, to get a ridiculous 10% S/L + 5% melee defense out of 3 slotted sets.
Suck it Kinetic Combat :P
Essentially:
3 sets of 4 kinetic combats gives you 4.5% hp and 11.25% S/L defense at the cost of 3 base slots and 9 placed slots (12 total)
1 set of the Brute ATO split 3/3 gives you 6% hp and 10% S/L defense at the cost of 2 base slots and 4 placed slots (6 total)
You're getting nearly the same bonus for half the investment. It's ridiculous. -
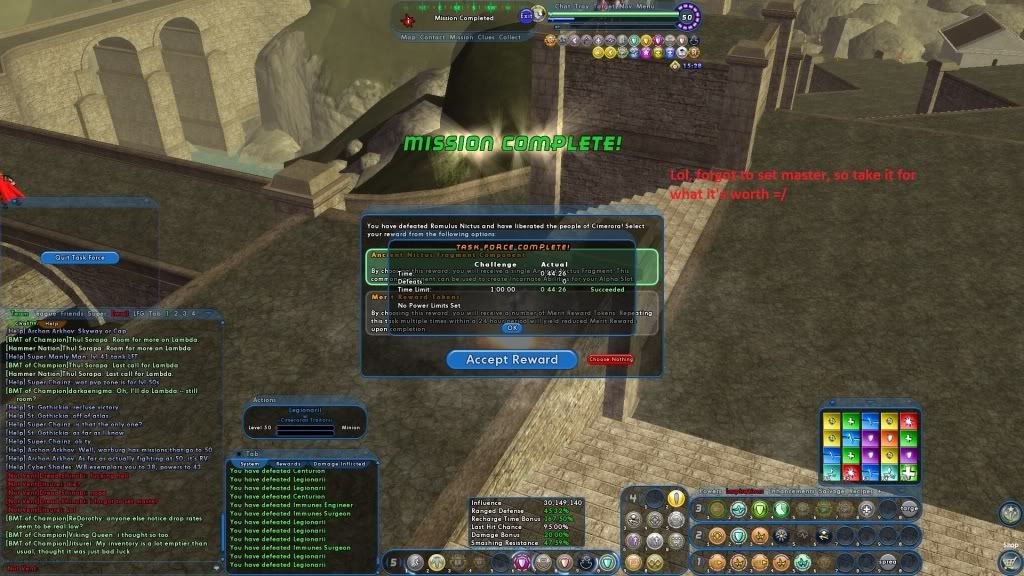
Update: Solo'd the ITF in 52 mins with this build, would have been master but I messed up on a nictus rez. I'll probably run it again to try n do better later, prefferably without dieing like a nub. For comparison, I believe the best solo ITF time was 40 mins by an ss/fire brute, so I'm pretty happy with the results.
Edit: I reran it and finished in 44:26 without dieing or using temps, butttt i forgot to set master. So take it for what it's worth =/
-
So with the addition of archetype origin enhancements (ATOs), ATs accross the board have been given options to reach new heights that they wouldn't have been able to reach previously.
Fire/Cold Corr is probably my favorite build in the whole game. Previously my fire/cold ran on a 32.5% M/R/A defense build, hitting softcap with a single purple insp. In addition to solid defenses backed up by Dark Embrace for S/L/N resists, I had perma benumb, heat loss, hasten, and soul drain. And while the build was incredible it was also stretched quite thin in the inspiration department.
Cold Domination has no self healing and no mez protection. To be completely self sufficient I would need around 8 greens and 4 break frees to cover those holes, leaving me 8 insp slots for purples to softcap when needed. Now keep in mind that this was built for team play (lvl 50 TFs and Trials only) and speed content. When the TFs/Trials only take 15-30 minutes to complete that insp tray will typically last you the entirety of the tf/trial, especially when I would be softcapped from other player's buffs/maneuvers much of the time.
However with the addition of the corruptor ATO which grants 3.75% Ranged defense (non purple) I was finally able to get my defense up to 40% Melee and 39% Ranged, which is softcap with Barrier's 2 min buff (6% def all, 5% resist all) while still keeping my perma soul drain, heat loss, benumb, and almost hasten.
It's probably the most obnoxiously stretched build I've ever made. So I felt like sharing.
Anyways here's the build:
Villain Plan by Mids' Villain Designer 1.954
http://www.cohplanner.com/
Level 50 Magic Corruptor
Primary Power Set: Fire Blast
Secondary Power Set: Cold Domination
Power Pool: Speed
Power Pool: Leaping
Power Pool: Fighting
Power Pool: Leadership
Ancillary Pool: Dark Mastery
Villain Profile:
------------
Level 1: Fire Blast Thundr-Acc/Dmg(A), Thundr-Dmg/EndRdx(3), Thundr-Acc/Dmg/EndRdx(3), Thundr-Dmg/Rchg(5), Thundr-Dmg/EndRdx/Rchg(5), Thundr-Acc/Dmg/Rchg(27)
Level 1: Infrigidate Empty(A)
Level 2: Fire Ball SMotCorruptor-Acc/Dmg(A), SMotCorruptor-Dmg/Rchg(7), SMotCorruptor-Acc/Dmg/Rchg(7), SMotCorruptor-Dmg/EndRdx/Rchg(9), SMotCorruptor-Acc/Dmg/EndRdx/Rchg(9), SMotCorruptor-Rchg/Dmg%(29)
Level 4: Ice Shield LkGmblr-Rchg+(A), LkGmblr-Def(11)
Level 6: Rain of Fire Ragnrk-Dmg(A), Ragnrk-Dmg/EndRdx(15), Ragnrk-Dmg/Rchg(25), Ragnrk-Knock%(25), Ragnrk-Acc/Rchg(27)
Level 8: Fire Breath Posi-Dam%(A), Posi-Dmg/EndRdx(21), Posi-Dmg/Rchg(21), Posi-Dmg/Rng(23), Posi-Acc/Dmg/EndRdx(23)
Level 10: Glacial Shield LkGmblr-Rchg+(A), LkGmblr-Def(15)
Level 12: Aim GSFC-Rchg/EndRdx(A), GSFC-ToHit/Rchg/EndRdx(13), GSFC-Build%(13), GSFC-ToHit/Rchg(17), GSFC-ToHit(19), GSFC-ToHit/EndRdx(19)
Level 14: Hasten RechRdx-I(A)
Level 16: Super Speed Zephyr-ResKB(A)
Level 18: Blaze Apoc-Dmg/Rchg(A), Apoc-Acc/Dmg/Rchg(33), Apoc-Acc/Rchg(33), Apoc-Dmg/EndRdx(33), Apoc-Dam%(34)
Level 20: Arctic Fog Aegis-ResDam(A), Aegis-ResDam/EndRdx(31), Aegis-ResDam/Rchg(31), LkGmblr-Rchg+(31), LkGmblr-Def/EndRdx(46), LkGmblr-Def(50)
Level 22: Combat Jumping LkGmblr-Rchg+(A)
Level 24: Boxing Amaze-Stun(A), Amaze-Acc/Rchg(29), Amaze-Acc/Stun/Rchg(34), Amaze-EndRdx/Stun(40), Amaze-Stun/Rchg(42)
Level 26: Tough GA-3defTpProc(A)
Level 28: Benumb Acc-I(A), RechRdx-I(34), RechRdx-I(45)
Level 30: Weave LkGmblr-Rchg+(A), LkGmblr-Def(40)
Level 32: Maneuvers RedFtn-Def(A), RedFtn-Def/EndRdx(36), RedFtn-Def/Rchg(37), RedFtn-EndRdx(37), RedFtn-EndRdx/Rchg(37), RedFtn-Def/EndRdx/Rchg(39)
Level 35: Sleet Achilles-ResDeb%(A), LdyGrey-Rchg/EndRdx(36), UndDef-Rchg/EndRdx(36)
Level 38: Heat Loss Efficacy-EndMod/Acc/Rchg(A), Efficacy-Acc/Rchg(39), Efficacy-EndMod/Rchg(43)
Level 41: Dark Consumption Oblit-Dmg(A), Oblit-Acc/Rchg(42), Oblit-Dmg/Rchg(42), Oblit-Acc/Dmg/Rchg(43), Oblit-Acc/Dmg/EndRdx/Rchg(43), Oblit-%Dam(45)
Level 44: Dark Embrace HO:Ribo(A), HO:Ribo(45), S'fstPrt-ResDam/Def+(46)
Level 47: Soul Drain Oblit-Dmg(A), Oblit-Acc/Rchg(48), Oblit-Acc/Dmg/EndRdx/Rchg(48), Oblit-Dmg/Rchg(48), Oblit-Acc/Dmg/Rchg(50), Oblit-%Dam(50)
Level 49: Soul Transfer RechRdx-I(A)
Level 0: Born In Battle
Level 0: High Pain Threshold
Level 0: Invader
Level 0: Marshal
Level 50: Agility Core Paragon
------------
Level 1: Brawl T'Death-Acc/Dmg(A), T'Death-Dmg/Rchg(11), T'Death-Acc/Dmg/EndRdx(17), T'Death-Dmg/EndRdx(39), T'Death-Dmg/EndRdx/Rchg(40), T'Death-Dam%(46)
Level 1: Scourge
Level 1: Sprint HO:Micro(A)
Level 2: Rest Empty(A)
Level 4: Ninja Run
Level 2: Swift Run-I(A)
Level 2: Health Numna-Regen/Rcvry+(A)
Level 2: Hurdle Jump-I(A)
Level 2: Stamina EndMod-I(A)
------------
Set Bonus Totals:
21% DamageBuff(Smashing)
21% DamageBuff(Lethal)
21% DamageBuff(Fire)
21% DamageBuff(Cold)
21% DamageBuff(Energy)
21% DamageBuff(Negative)
21% DamageBuff(Toxic)
21% DamageBuff(Psionic)
12.88% Defense(Smashing)
12.88% Defense(Lethal)
10.38% Defense(Fire)
10.38% Defense(Cold)
14.75% Defense(Energy)
14.75% Defense(Negative)
6% Defense(Psionic)
19.75% Defense(Melee)
19.75% Defense(Ranged)
10.06% Defense(AoE)
64% Enhancement(Accuracy)
98.75% Enhancement(RechargeTime)
10% Enhancement(Range)
9% FlySpeed
124.5 HP (11.62%) HitPoints
9% JumpHeight
9% JumpSpeed
Knockback (Mag -4)
Knockup (Mag -4)
MezResist(Held) 2.75%
MezResist(Immobilize) 4.95%
MezResist(Stun) 4.4%
16.5% (0.28 End/sec) Recovery
56% (2.5 HP/sec) Regeneration
7.88% Resistance(Fire)
7.88% Resistance(Cold)
14% RunSpeed
| Copy & Paste this data into Mids' Hero Designer to view the build |
|-------------------------------------------------------------------|
|MxDz;1507;700;1400;HEX;|
|78DA6594594F13511886CF4CA7624B4B5BD9776885164AA71 D40BD30D10410A3528|
|39AA8C1A569E8502662A7194AA277E2BDFA0B5CE38289A224 6ED118C5C42BFF827F|
|C1E5DAAD7ECCFB592676D2E639F37EFB993993BE30E15BDDB FBC574881F185ECE26|
|266DCB4ACA562C9B4DCE96CDE987509BA6AE8DF5E31648E66 0B793DA74E1A969E19|
|A3A052D7A66D6C696E4E1D3717729909F3BC51C8960CB320B CD3A6B9A01E2BEA7AC|
|E672FA7F46CD128E4FDF6CDA4919F2FD15DE09F29A75B8BF3 4631B4AF68CCAA1359|
|EB5C264D4574EB620BF53148FFA82CF82ABBC57582A608F90 6F336A8DC64DE01DB6|
|E81AFA54A2CFDE81231CA267136E991CBF6DAF298B90A6E7D C27C0A76AC816F28D0|
|8558C9D528D99AB7011CA0BC6ED814F7B06C6B753BC19611E 62EB06D07382863B73|
|7626A5EA1E38667CCE760D30BE64BF02D95F3700F1EEEA18E 7B8853BE5A9EADF601|
|6AF8EE331F82C17BE0B6BBCC15304C8DF825EC943F8E5A11D 202AC053EC36F8810E|
|29E4309683D2A33C94C81BD1AF88E72D4238FBB7E14BD76A5 981A93674904418D67|
|6AA21E1AB98746F691486BE61E9A0FA246479A6B4E81D1C3E 0C021D04531AD9CA77|
|518CFF33DDDB7238FDCDE86997B79F621A642719D88933AB9 7E947B0B91AD9BE7EA|
|AE8316F182DB6B9901A60FECF783EB8430D70EAF538FF514F B09BD463E821FC8A74|
|FC8B64FDF5568FDD7F8DDB9025EA25162F61B5D76C77EF2CC BF98BFD9F70FB3CCCF|
|5060FE65421CFDCBF13D044588219B2E91682643A7222E938 FCAF955CE9FE4FC49C|
|E97E43A1AD7D138FF8A5F88149FBE14EF6787E238CD331BC7 9BCED069307806EC3F|
|0546CF82890C38A8FC7F9A53558A56A58C5429A355CA814DA 53CB5B1E63745ECC6A|
|E4C2B95AF8690EC084FB0F22D287FF1929523A404E6FCE6D4 8EE3997F756A31F87D|
|776A3DD08E78EDDA76EE138EF549C77AC6B1FED14461C851F E0BB936E650|
|-------------------------------------------------------------------|
Some notes:
----Because of how far I had to stretch this build to reach certain set bonus totals, this build desperately calls for enhancement boosters to get certain powers to be perma, additionally the original build was spiritual, whereas I had to switch to Agility to reach softcap, which was another 12% loss in recharge.
Basically the IO's that I had to use enhancement boosters on were:
Hasten: Rchg IO +5
All 3 IOs in Benumb got +2
All 3 IOs in Heat Loss got +5
The Defense IOs in Ice Shield and Glacial Shield got +3
The rchg/end IOs in Sleet got +2
I put some enhancement boosters in some other powers, however they weren't necessary to make the build work.
----Heat Loss is perma and will keep you topped out with just a single target (the self buff+the target hit).
----You can switch between Clarion and Rebirth if your team needs those buffs more. Typically you will be way above softcap on teams anyways without needing Barrier. Use Barrier for soloing or small team content or on teams without any passive defense buffs to keep you softcapped. This build is incredibly survivable with Barrier's 2 min buff or Rebirth if you don't need barrier.
----Yes I did 6 slot brawl and 5 slot boxing. It was impossible to hit the numbers that I did without slotting them as such.
----The Glad Javelin set in Fireball is the Malice of the Corruptor set.
Since mids hasn't updated with ATOs and enhancement boosters yet my ingame numbers are:
1393.5 hp
12.54 hp/sec
3.23 end/sec recovery without heat loss
1.87 end/sec Consumption
20% +dmg without soul drain
97.50% rchg without hasten
31.34% s/l res
31% f/c res
23.12% nrg res
17.1% neg res
0% psy res
17.1% Tox Res
39.32% Ranged Def
40.57% Melee Def
30.88% AoE Def
But yeah, basically I'm just sharing. If you have any comments, questions, or suggestions (always looking to improve it!), feel free to post
Edit: Updated with ATOs -
Yes, scorpion shield is /that/ good. It's also for the most part the easiest option to reach softcap for most ranged ATs.
However some ATs can get much more mileage out of resist shields if you can get softcap via IOs, however this is much more difficult. Basically you want softcap in some form or another, however if you can get softcap without scorp shield you can pick up a resist shield and you will be much more survivable. My Fire/Time for example has 45% def to M/R/A defense and uses a resist shield, my Fire/Cold has 45% to M/R defense and uses a resist shield, and my Nin/Dark MM has 45% defense to ranged with a resist shield, all 3 of those toons are much more survivable than any toon that just had a scorpion shield. -
I'm not sure if they can be slotted at -3 of your current level.